Unity FSM 노드 비주얼화: 커스텀 인스펙터 에디터 툴 구현 가이드
Unity C#에서 FSM 상태와 전이 정보를 커스텀 인스펙터에 노드 형태로 시각화하는 방법을 다룹니다. SerializedProperty 기반 편집, 전이 검증, Undo 대응, 성능 고려까지 실용적인 구현 절차를 정리합니다.
핵심 요약
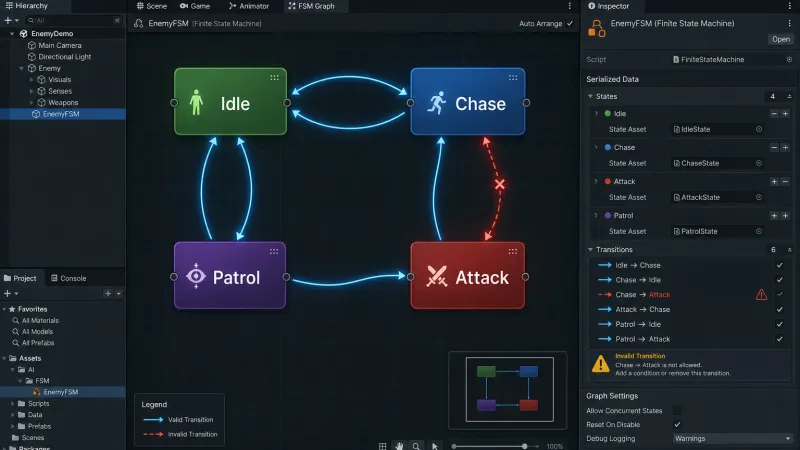
Unity의 FSM을 커스텀 인스펙터에서 노드와 연결선으로 표시하면 상태 전이 오류를 데이터 편집 단계에서 빠르게 발견할 수 있다. 핵심은 런타임 FSM 데이터는 단순하게 유지하고 CustomEditor와 SerializedProperty가 그 데이터를 읽어 에디터 전용 시각화와 검증 기능을 제공하도록 분리하는 것이다.
이 글은 Unity 2022.3 LTS와 C#을 기준으로 ScriptableObject 기반 FSM을 대상으로 한다. 상태 ID, 전이 대상, 조건을 직렬화하고 OnInspectorGUI()에서 노드 레이아웃과 전이선을 그리는 구현을 다룬다.
FSM 노드 비주얼화는 왜 필요한가?
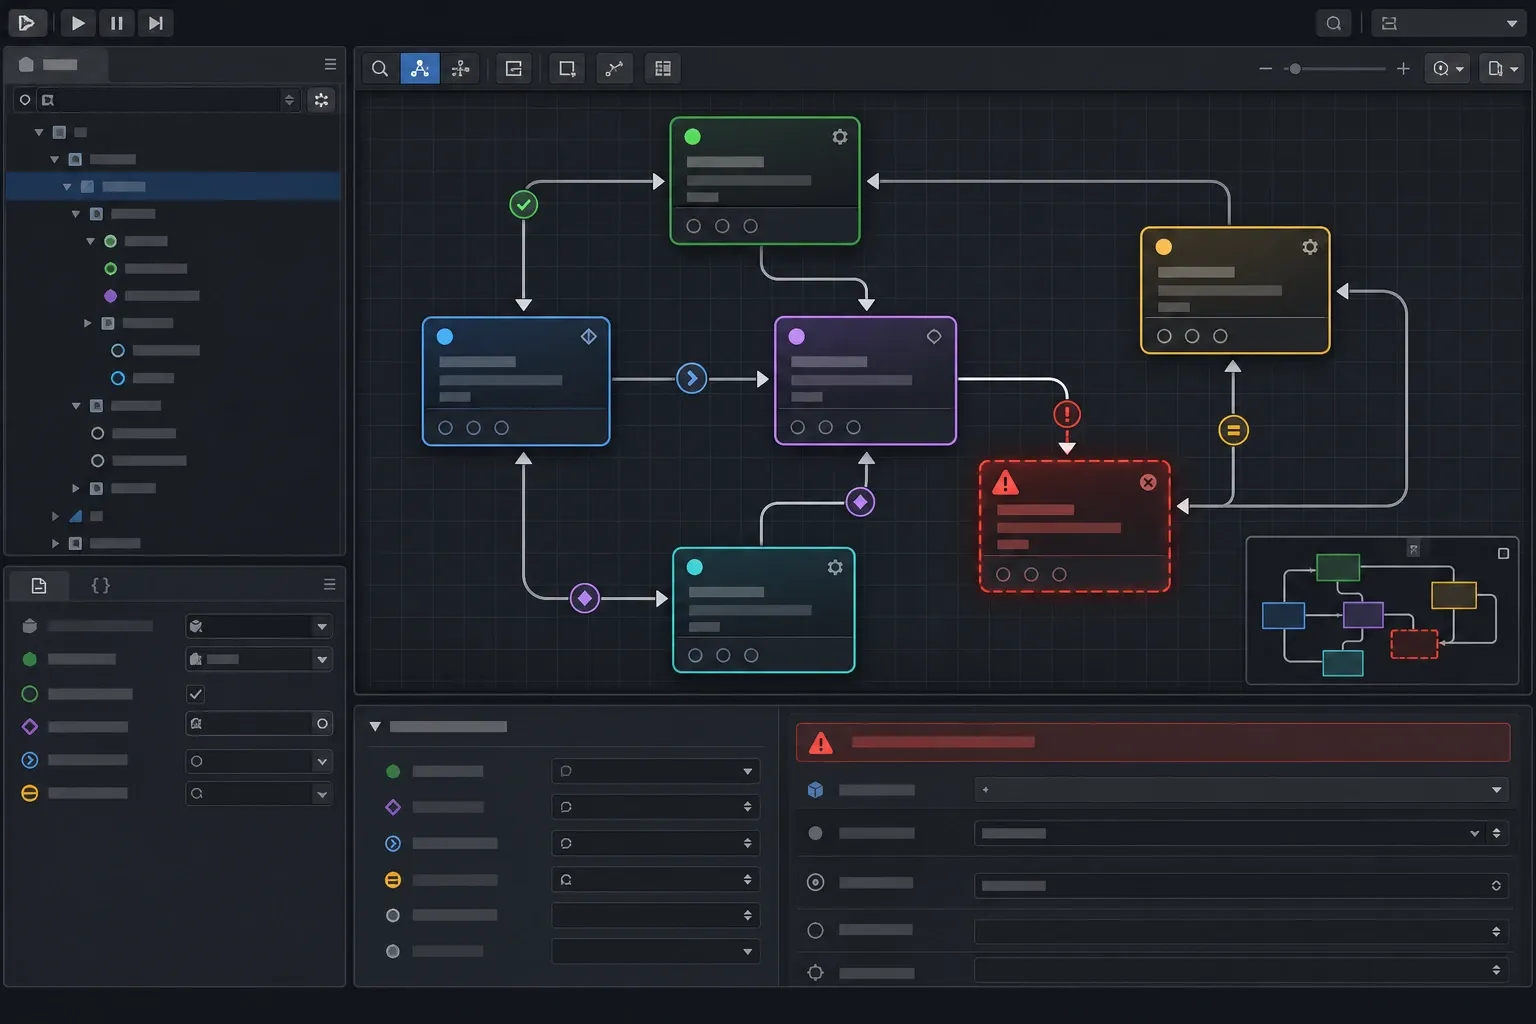
FSM(Finite State Machine)은 플레이어, 적 AI, UI 화면, 퀘스트 진행처럼 명확한 상태 전환이 필요한 게임 기능에 널리 사용된다. 하지만 기본 인스펙터에서 상태와 전이를 배열로만 관리하면 다음 문제가 생긴다.
| 문제 | 기본 인스펙터에서 보이는 증상 | 노드 시각화로 얻는 효과 |
|---|---|---|
| 끊어진 전이 | 존재하지 않는 상태 ID를 참조 | 빨간 연결선과 경고로 즉시 식별 |
| 고립 상태 | 진입하거나 이탈할 수 없는 상태 | 연결 수를 한눈에 확인 |
| 순환 전이 | 의도하지 않은 무한 전환 가능성 | 상태 간 방향 관계를 빠르게 파악 |
| 복잡한 배열 편집 | 전이 대상과 조건의 맥락이 분리됨 | 상태별 관계를 한 화면에 표시 |
노드 뷰는 런타임 디버거를 대체하는 기능이 아니다. 설계 데이터의 구조를 검토하고 잘못된 참조를 저장 전에 잡아내는 에디터 도구로 두는 편이 유지보수에 유리하다.
FSM 데이터는 어떻게 설계할까?
에디터 UI를 먼저 만들기보다 런타임에서도 안정적으로 사용할 수 있는 직렬화 모델을 만든다. 예제에서는 각 상태에 고유한 id를 두고 전이는 목적지 상태 ID와 조건 이름을 가진다.
using System;
using System.Collections.Generic;
using UnityEngine;

[CreateAssetMenu(menuName = "Game/FSM Definition")]
public class FsmDefinition : ScriptableObject
{
    public string entryStateId;
    public List<FsmStateDefinition> states = new();
}

[Serializable]
public class FsmStateDefinition
{
    public string id;
    public string displayName;
    [TextArea] public string description;
    public Vector2 editorPosition;
    public List<FsmTransitionDefinition> transitions = new();
}

[Serializable]
public class FsmTransitionDefinition
{
    public string targetStateId;
    public string conditionName;
}editorPosition은 런타임 FSM 동작에는 필요 없지만 노드 배치를 유지하기 위한 에디터 메타데이터다. 런타임 빌드 크기를 엄격히 관리해야 한다면 별도의 에디터 전용 레이아웃 에셋으로 분리할 수 있다. 대부분의 소규모 데이터에서는 같은 ScriptableObject에 보관하는 편이 편집성과 변경 추적 측면에서 단순하다.
상태 ID와 표시 이름을 분리해야 하는 이유
displayName은 디자이너가 읽기 좋은 이름이며 변경될 수 있다. 반면 id는 전이 참조와 저장 데이터에 쓰이는 안정적인 식별자다. 따라서 전이 참조는 표시 이름이 아니라 id로 연결한다.
public bool HasState(string stateId)
{
    return states.Exists(state => state.id == stateId);
}
상태 ID를 사람이 직접 입력하게 한다면 중복 검증은 필수다. 더 견고하게 만들려면 생성 시 GUID를 발급하고 화면에는 별도 표시 이름만 노출하는 방식을 사용할 수 있다.
Unity 커스텀 인스펙터로 FSM 노드를 어떻게 그릴까?
구현 순서는 세 단계다.
CustomEditor에서SerializedProperty로 FSM 데이터를 찾는다.- 각 상태의
editorPosition을 기준으로 노드Rect를 계산한다. - 상태 간 전이를 곡선으로 그리고 유효하지 않은 참조는 색상과 도움말로 표시한다.
SerializedObject와 SerializedProperty를 사용하면 Undo/Redo, 프리팹 오버라이드, 멀티 오브젝트 편집 등 Unity의 직렬화 흐름을 따를 수 있다. 대상 객체 필드에 직접 값을 대입하는 방식은 이런 기능을 우회하므로 피하는 편이 좋다.
using System.Collections.Generic;
using UnityEditor;
using UnityEngine;

[CustomEditor(typeof(FsmDefinition))]
public class FsmDefinitionEditor : Editor
{
    private const float NodeWidth = 180f;
    private const float NodeHeight = 92f;

    private SerializedProperty entryStateIdProperty;
    private SerializedProperty statesProperty;

    private void OnEnable()
    {
        entryStateIdProperty = serializedObject.FindProperty("entryStateId");
        statesProperty = serializedObject.FindProperty("states");
    }

    public override void OnInspectorGUI()
    {
        serializedObject.Update();

        EditorGUILayout.PropertyField(entryStateIdProperty);
        EditorGUILayout.Space(8);

        DrawGraph();

        foreach (string message in CollectValidationMessages())
            EditorGUILayout.HelpBox(message, MessageType.Error);

        EditorGUILayout.Space(8);
        EditorGUILayout.PropertyField(statesProperty, true);

        serializedObject.ApplyModifiedProperties();
    }

    private void DrawGraph()
    {
        float graphHeight = Mathf.Max(220f, GetGraphHeight());
        Rect graphRect = GUILayoutUtility.GetRect(0, graphHeight, GUILayout.ExpandWidth(true));

        EditorGUI.DrawRect(graphRect, new Color(0.12f, 0.12f, 0.12f));
        GUI.Label(new Rect(graphRect.x + 8, graphRect.y + 6, 240, 20), "FSM Transition Graph", EditorStyles.boldLabel);

        Dictionary<string, Rect> nodeRects = BuildNodeRects(graphRect);
        DrawTransitions(nodeRects);
        DrawNodes(nodeRects);
        HandleNodeDrag(graphRect);
    }

    private Dictionary<string, Rect> BuildNodeRects(Rect graphRect)
    {
        Dictionary<string, Rect> result = new();

        for (int i = 0; i < statesProperty.arraySize; i++)
        {
            SerializedProperty state = statesProperty.GetArrayElementAtIndex(i);
            string id = state.FindPropertyRelative("id").stringValue;
            Vector2 position = state.FindPropertyRelative("editorPosition").vector2Value;

            Rect nodeRect = new(
                graphRect.x + 12 + position.x,
                graphRect.y + 30 + position.y,
                NodeWidth,
                NodeHeight);

            if (!string.IsNullOrWhiteSpace(id))
                result[id] = nodeRect;
        }

        return result;
    }

    private void DrawTransitions(Dictionary<string, Rect> nodeRects)
    {
        for (int i = 0; i < statesProperty.arraySize; i++)
        {
            SerializedProperty state = statesProperty.GetArrayElementAtIndex(i);
            string sourceId = state.FindPropertyRelative("id").stringValue;
            if (!nodeRects.TryGetValue(sourceId, out Rect sourceRect))
                continue;

            SerializedProperty transitions = state.FindPropertyRelative("transitions");
            for (int j = 0; j < transitions.arraySize; j++)
            {
                SerializedProperty transition = transitions.GetArrayElementAtIndex(j);
                string targetId = transition.FindPropertyRelative("targetStateId").stringValue;
                bool isValid = nodeRects.TryGetValue(targetId, out Rect targetRect);

                Color color = isValid
                    ? new Color(0.3f, 0.8f, 1f)
                    : new Color(1f, 0.3f, 0.3f);

                Vector3 start = new(sourceRect.xMax, sourceRect.center.y);
                Vector3 end = isValid
                    ? new Vector3(targetRect.xMin, targetRect.center.y)
                    : start + Vector3.right * 48f;

                Handles.DrawBezier(
                    start,
                    end,
                    start + Vector3.right * 48f,
                    end + Vector3.left * 48f,
                    color,
                    null,
                    3f);
            }
        }
    }

    private void DrawNodes(Dictionary<string, Rect> nodeRects)
    {
        foreach ((string id, Rect rect) in nodeRects)
        {
            bool isEntry = entryStateIdProperty.stringValue == id;
            Color background = isEntry
                ? new Color(0.2f, 0.55f, 0.3f)
                : new Color(0.23f, 0.29f, 0.38f);

            EditorGUI.DrawRect(rect, background);
            GUI.Box(rect, GUIContent.none);
            GUI.Label(
                new Rect(rect.x + 8, rect.y + 8, rect.width - 16, 20),
                isEntry ? $"ENTRY · {id}" : id,
                EditorStyles.boldLabel);
        }
    }

    private float GetGraphHeight()
    {
        float maxY = 0f;
        for (int i = 0; i < statesProperty.arraySize; i++)
        {
            SerializedProperty state = statesProperty.GetArrayElementAtIndex(i);
            maxY = Mathf.Max(maxY, state.FindPropertyRelative("editorPosition").vector2Value.y);
        }

        return maxY + NodeHeight + 50f;
    }
}
이 예제는 Inspector IMGUI 기반의 읽기 중심 그래프다. Handles.DrawBezier()는 노드 중심을 직선으로 잇는 것보다 전이 방향을 구분하기 쉬우며 노드가 가까워도 관계를 읽기 좋다.
전이 오류는 어떤 기준으로 검증해야 할까?
전이 검증은 단순히 대상 ID가 비어 있는지 확인하는 수준에서 끝내면 부족하다. 최소한 중복 상태 ID, 비어 있는 상태 ID, 존재하지 않는 대상 상태, 엔트리 상태 누락을 검사해야 한다.
private List<string> CollectValidationMessages()
{
    HashSet<string> ids = new();
    List<string> messages = new();

    for (int i = 0; i < statesProperty.arraySize; i++)
    {
        SerializedProperty state = statesProperty.GetArrayElementAtIndex(i);
        string id = state.FindPropertyRelative("id").stringValue;

        if (string.IsNullOrWhiteSpace(id))
            messages.Add($"상태 {i}의 ID가 비어 있습니다.");
        else if (!ids.Add(id))
            messages.Add($"중복 상태 ID: {id}");
    }

    if (!string.IsNullOrWhiteSpace(entryStateIdProperty.stringValue) &&
        !ids.Contains(entryStateIdProperty.stringValue))
    {
        messages.Add($"엔트리 상태를 찾을 수 없습니다: {entryStateIdProperty.stringValue}");
    }

    return messages;
}
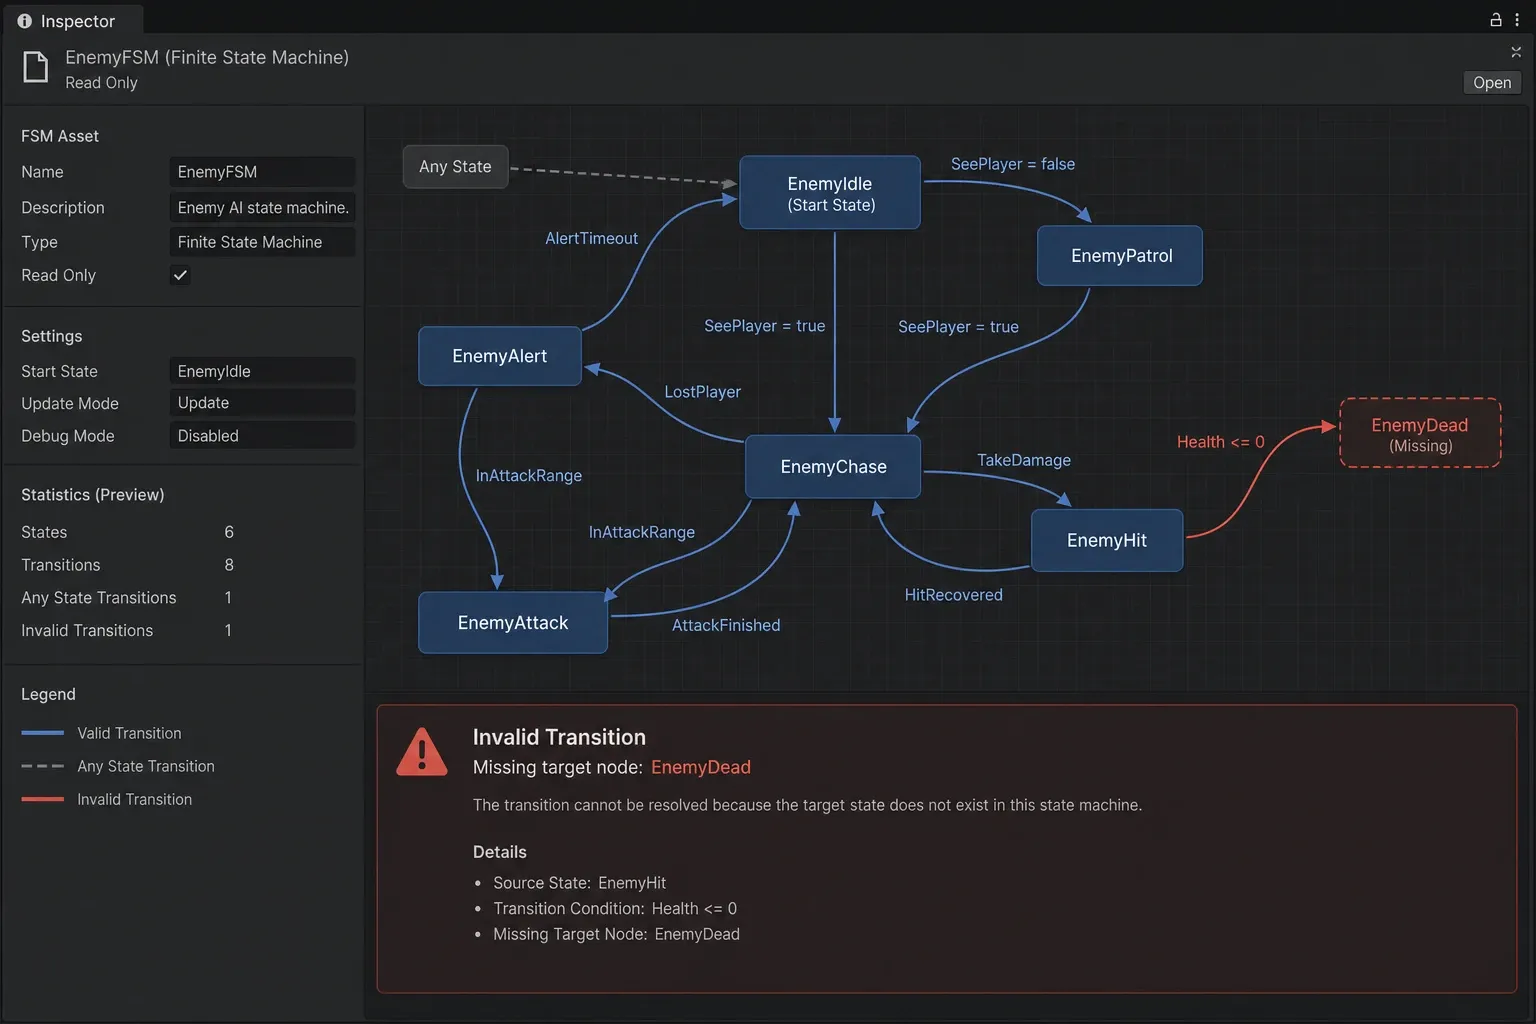
검증 메시지는 그래프 위나 아래에 EditorGUILayout.HelpBox()로 출력한다. 잘못된 대상 상태는 앞서 구현한 것처럼 빨간 연결선으로도 표시하면 배열을 펼치지 않아도 오류 위치를 찾을 수 있다.
순환 전이는 오류인가?
순환 전이는 대체로 오류가 아니다. Idle → Chase → Attack → Chase처럼 게임플레이 FSM에는 정상적인 순환이 흔하다. 대신 같은 프레임에 조건 없이 반복 전환할 가능성이 있는지 런타임 규칙으로 통제해야 한다.
상태 전환 비용을 단순화하면 프레임당 비용은 다음처럼 볼 수 있다.
여기서 N_transition이 비정상적으로 증가하면 애니메이션 재진입, 이벤트 중복 발행, 상태 초기화 반복이 발생할 수 있다. 전이 직후에는 같은 프레임의 재평가를 막거나 최대 전이 횟수를 제한하는 방식이 실용적이다.
노드를 드래그 가능한 에디터 툴로 확장하는 방법
읽기 전용 시각화가 안정적으로 동작한 뒤 드래그 기능을 추가한다. 한 번의 마우스 이동마다 즉시 저장하지 말고 드래그 중인 상태와 시작 위치를 기억한 다음 MouseDrag 이벤트에서 해당 상태의 editorPosition만 수정한다.
- 노드
Rect에 마우스가 들어왔는지 검사한다. MouseDown에서 선택한 상태 인덱스와 마우스 오프셋을 저장한다.MouseDrag에서SerializedProperty.vector2Value를 갱신하고GUI.changed를 설정한다.MouseUp에서 드래그 상태를 해제한다.
private int draggingStateIndex = -1;
private Vector2 dragOffset;

private void HandleNodeDrag(Rect graphRect)
{
    Event current = Event.current;

    if (current.type == EventType.MouseDown && current.button == 0)
    {
        for (int i = 0; i < statesProperty.arraySize; i++)
        {
            SerializedProperty state = statesProperty.GetArrayElementAtIndex(i);
            Vector2 position = state.FindPropertyRelative("editorPosition").vector2Value;
            Rect rect = new(graphRect.x + 12 + position.x, graphRect.y + 30 + position.y, NodeWidth, NodeHeight);

            if (!rect.Contains(current.mousePosition))
                continue;

            draggingStateIndex = i;
            dragOffset = current.mousePosition - rect.position;
            current.Use();
            break;
        }
    }

    if (current.type == EventType.MouseDrag && draggingStateIndex >= 0)
    {
        SerializedProperty state = statesProperty.GetArrayElementAtIndex(draggingStateIndex);
        SerializedProperty position = state.FindPropertyRelative("editorPosition");
        position.vector2Value = current.mousePosition - graphRect.position - dragOffset - new Vector2(12, 30);
        GUI.changed = true;
        current.Use();
    }

    if (current.type == EventType.MouseUp)
        draggingStateIndex = -1;
}HandleNodeDrag(graphRect)는 DrawGraph() 안에서 노드를 그리기 전에 호출한다. 실제 제작 도구에서는 노드를 그래프 영역 안에 제한하고 일정 단위로 스냅하며 음수 좌표를 허용할지 정책을 정하는 것이 좋다.
IMGUI와 GraphView 중 무엇을 선택해야 할까?
처음부터 대형 노드 에디터를 만들 필요는 없다. 목적과 데이터 규모에 따라 선택한다.
| 기준 | Inspector IMGUI | UI Toolkit GraphView 계열 |
|---|---|---|
| 적합한 규모 | 상태 수가 적고 검증 중심인 FSM | 다수의 노드와 포트 편집이 필요한 도구 |
| 구현 난이도 | 낮음 | 높음 |
| 드래그·선택 | 직접 이벤트 처리 필요 | 그래프 상호작용 구현에 유리 |
| Inspector 통합 | 매우 자연스러움 | 별도 EditorWindow가 보통 적합 |
| 추천 용도 | AI 상태 5~30개, UI 상태 관리 | 퀘스트 그래프, 대화 그래프, 비주얼 스크립팅 |
GraphView는 Unity의 실험적 API로 알려져 있어 장기 유지보수와 Unity 버전 호환성을 확인해야 한다. 단순한 FSM을 위해 대규모 그래프 프레임워크를 도입하면 데이터 모델과 도구 유지 비용만 커질 수 있다.
커스텀 인스펙터 성능과 유지보수 체크리스트
인스펙터는 선택된 오브젝트가 갱신될 때 여러 번 다시 그려질 수 있다. 다음 원칙을 적용하면 편집 환경이 안정적이다.
OnInspectorGUI()에서 파일 I/O, 에셋 검색, 리플렉션을 매번 수행하지 않는다.Dictionary<string, Rect>처럼 현재 프레임에서 필요한 임시 구조만 만들고 큰 데이터는 필요할 때만 캐시한다.- 노드 수가 많으면 전체 전이선을 항상 그리지 말고 선택 상태 주변 전이만 강조하는 옵션을 둔다.
- 데이터 변경은 반드시
serializedObject.Update()와serializedObject.ApplyModifiedProperties()사이에서 수행한다. - 런타임 FSM 클래스는
UnityEditor네임스페이스를 참조하지 않는다. 에디터 코드는Editor폴더 또는 에디터 전용 어셈블리 정의 파일에 둔다.
자주 묻는 질문 (FAQ)
FSM 노드 에디터는 런타임 빌드에 포함되는가?
UnityEditor를 사용하는 커스텀 인스펙터 코드는 Editor 폴더 또는 Editor 전용 어셈블리에 두면 플레이어 빌드에 포함되지 않는다. FsmDefinition 같은 데이터 클래스만 런타임에 포함된다.
전이 대상에 문자열 ID 대신 객체 참조를 사용해도 되는가?
가능하다. 같은 에셋 안의 상태를 참조하는 구조라면 인덱스나 객체 참조가 편할 수 있다. 다만 상태를 독립 에셋으로 분리하거나 외부 저장 데이터와 연동한다면 안정적인 문자열 GUID가 더 다루기 쉽다.
언제 별도 EditorWindow로 옮겨야 하는가?
패닝, 줌, 다중 선택, 포트 연결 편집, 미니맵, 검색처럼 그래프 조작 자체가 주요 작업이 되면 EditorWindow가 적합하다. 검증과 간단한 구조 확인이 목적이면 Inspector 안의 노드 뷰가 더 빠르고 단순하다.
정리
FSM 노드 비주얼화의 목표는 화려한 그래프 UI가 아니라 상태 데이터의 오류를 빠르게 발견하는 데 있다. 먼저 ScriptableObject 기반 데이터 모델, 안정적인 상태 ID, SerializedProperty 기반 편집과 전이 검증을 구현한다. 이후 실제 작업 흐름에서 필요성이 확인된 기능만 드래그, 스냅, 줌, 별도 그래프 창 순으로 추가하면 복잡도를 통제하면서 유용한 Unity 에디터 툴을 만들 수 있다.